These are the instructions for creating your book cover design in Photoshop:
Book cover design follows steadfast parameters.
In Photoshop, choose “File>Open” - then navigate to the PDF you downloaded.
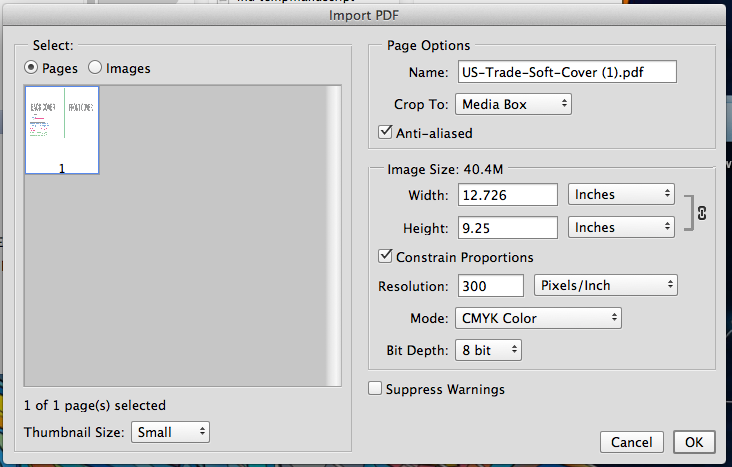
You’ll see a dialog box pop up.

Make sure that when this window pops up, you have the following options selected properly-
CROP TO- Select “Media Box”
RESOLUTION- 300 Pixels/Inch
MODE: CMYK Color
Press OK
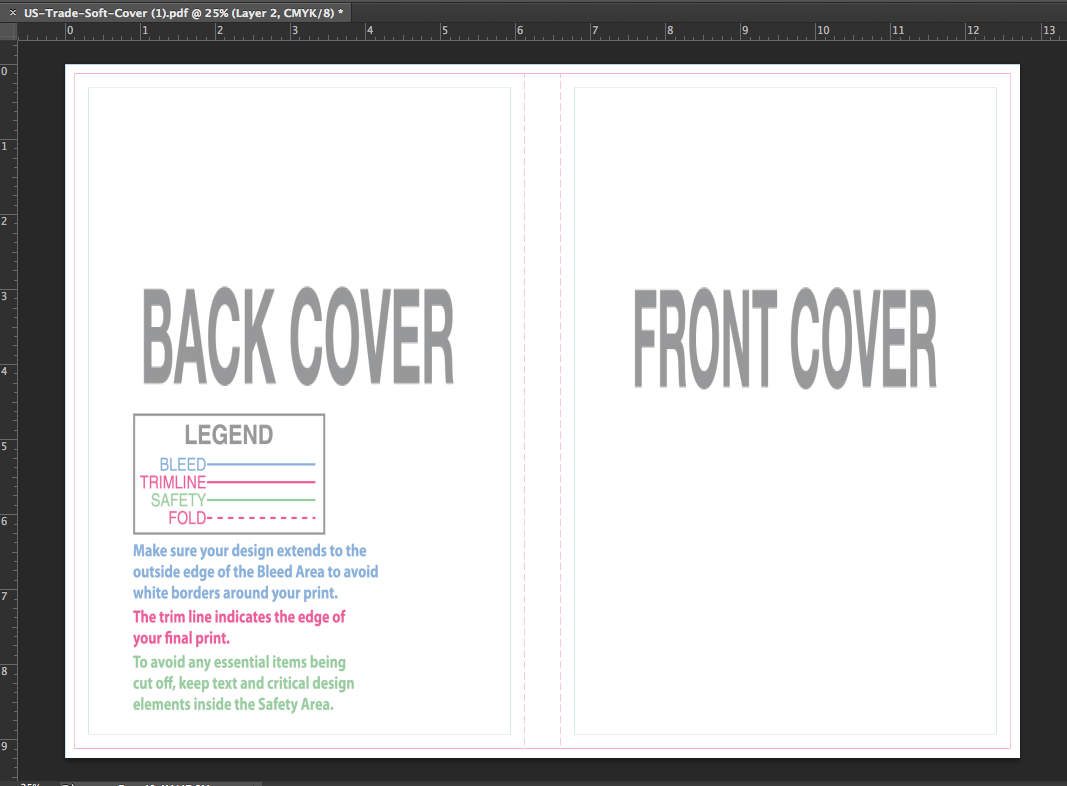
The template will open into a new window.
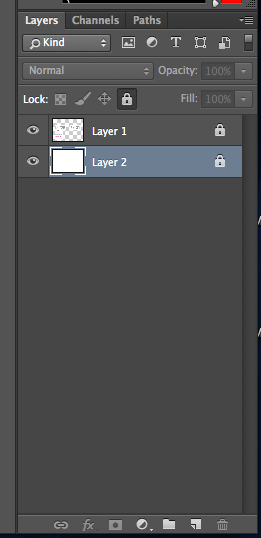
At this point, your template will be difficult to view clearly. First, lock the template layer (it will be the only layer) - select it and press the padlock icon.
Next, add a new layer (“Layer>New>Layer”)
A new layer will be created ABOVE the template layer- drag it BELOW the template (by selecting the layer in the layer stack, holding the mouse button down, and dragging it down below the template layer).
Next, with the new layer selected (it will be highlighted), Select All “Select>All”- (Shortcut is Command+A on Macintosh systems, Cntrl+A on PC), then Fill the background with White.
“Edit>Fill” - when the dialog box comes up, select “White” under contents - making sure opacity is set to 100%.
Lock this new layer as well.

At this point, your template will be fully visible.

Add a new layer between the template and your white background layer to start building your art- or place existing art between the two locked layers, and start lining up your elements.
Once you’ve completed your art (remember to save often and save as PSD so you can fix any mistakes easily) you’ll save a PDF (PDF/X4:2008 is the LATEST version of the PDF/X format we recommend, but earlier is perfectly fine).
Prior to saving your finished work as a PDF, delete the template guides, as you won’t want them to appear on your final product. You’ll then upload this PDF file to your account for proofing.
BookBaby also offers professional design and book formatting services if you're looking for a complete solution.
